- Help
- Forms
Sharing Form Pages
In this guide, you will learn
- How to make a form open to the public
- How to send form requests to individuals
Sharing Forms
There are two primary ways to share a form with those who need to fill it out and submit it:
- Make it open to the public
- Send a form request via email
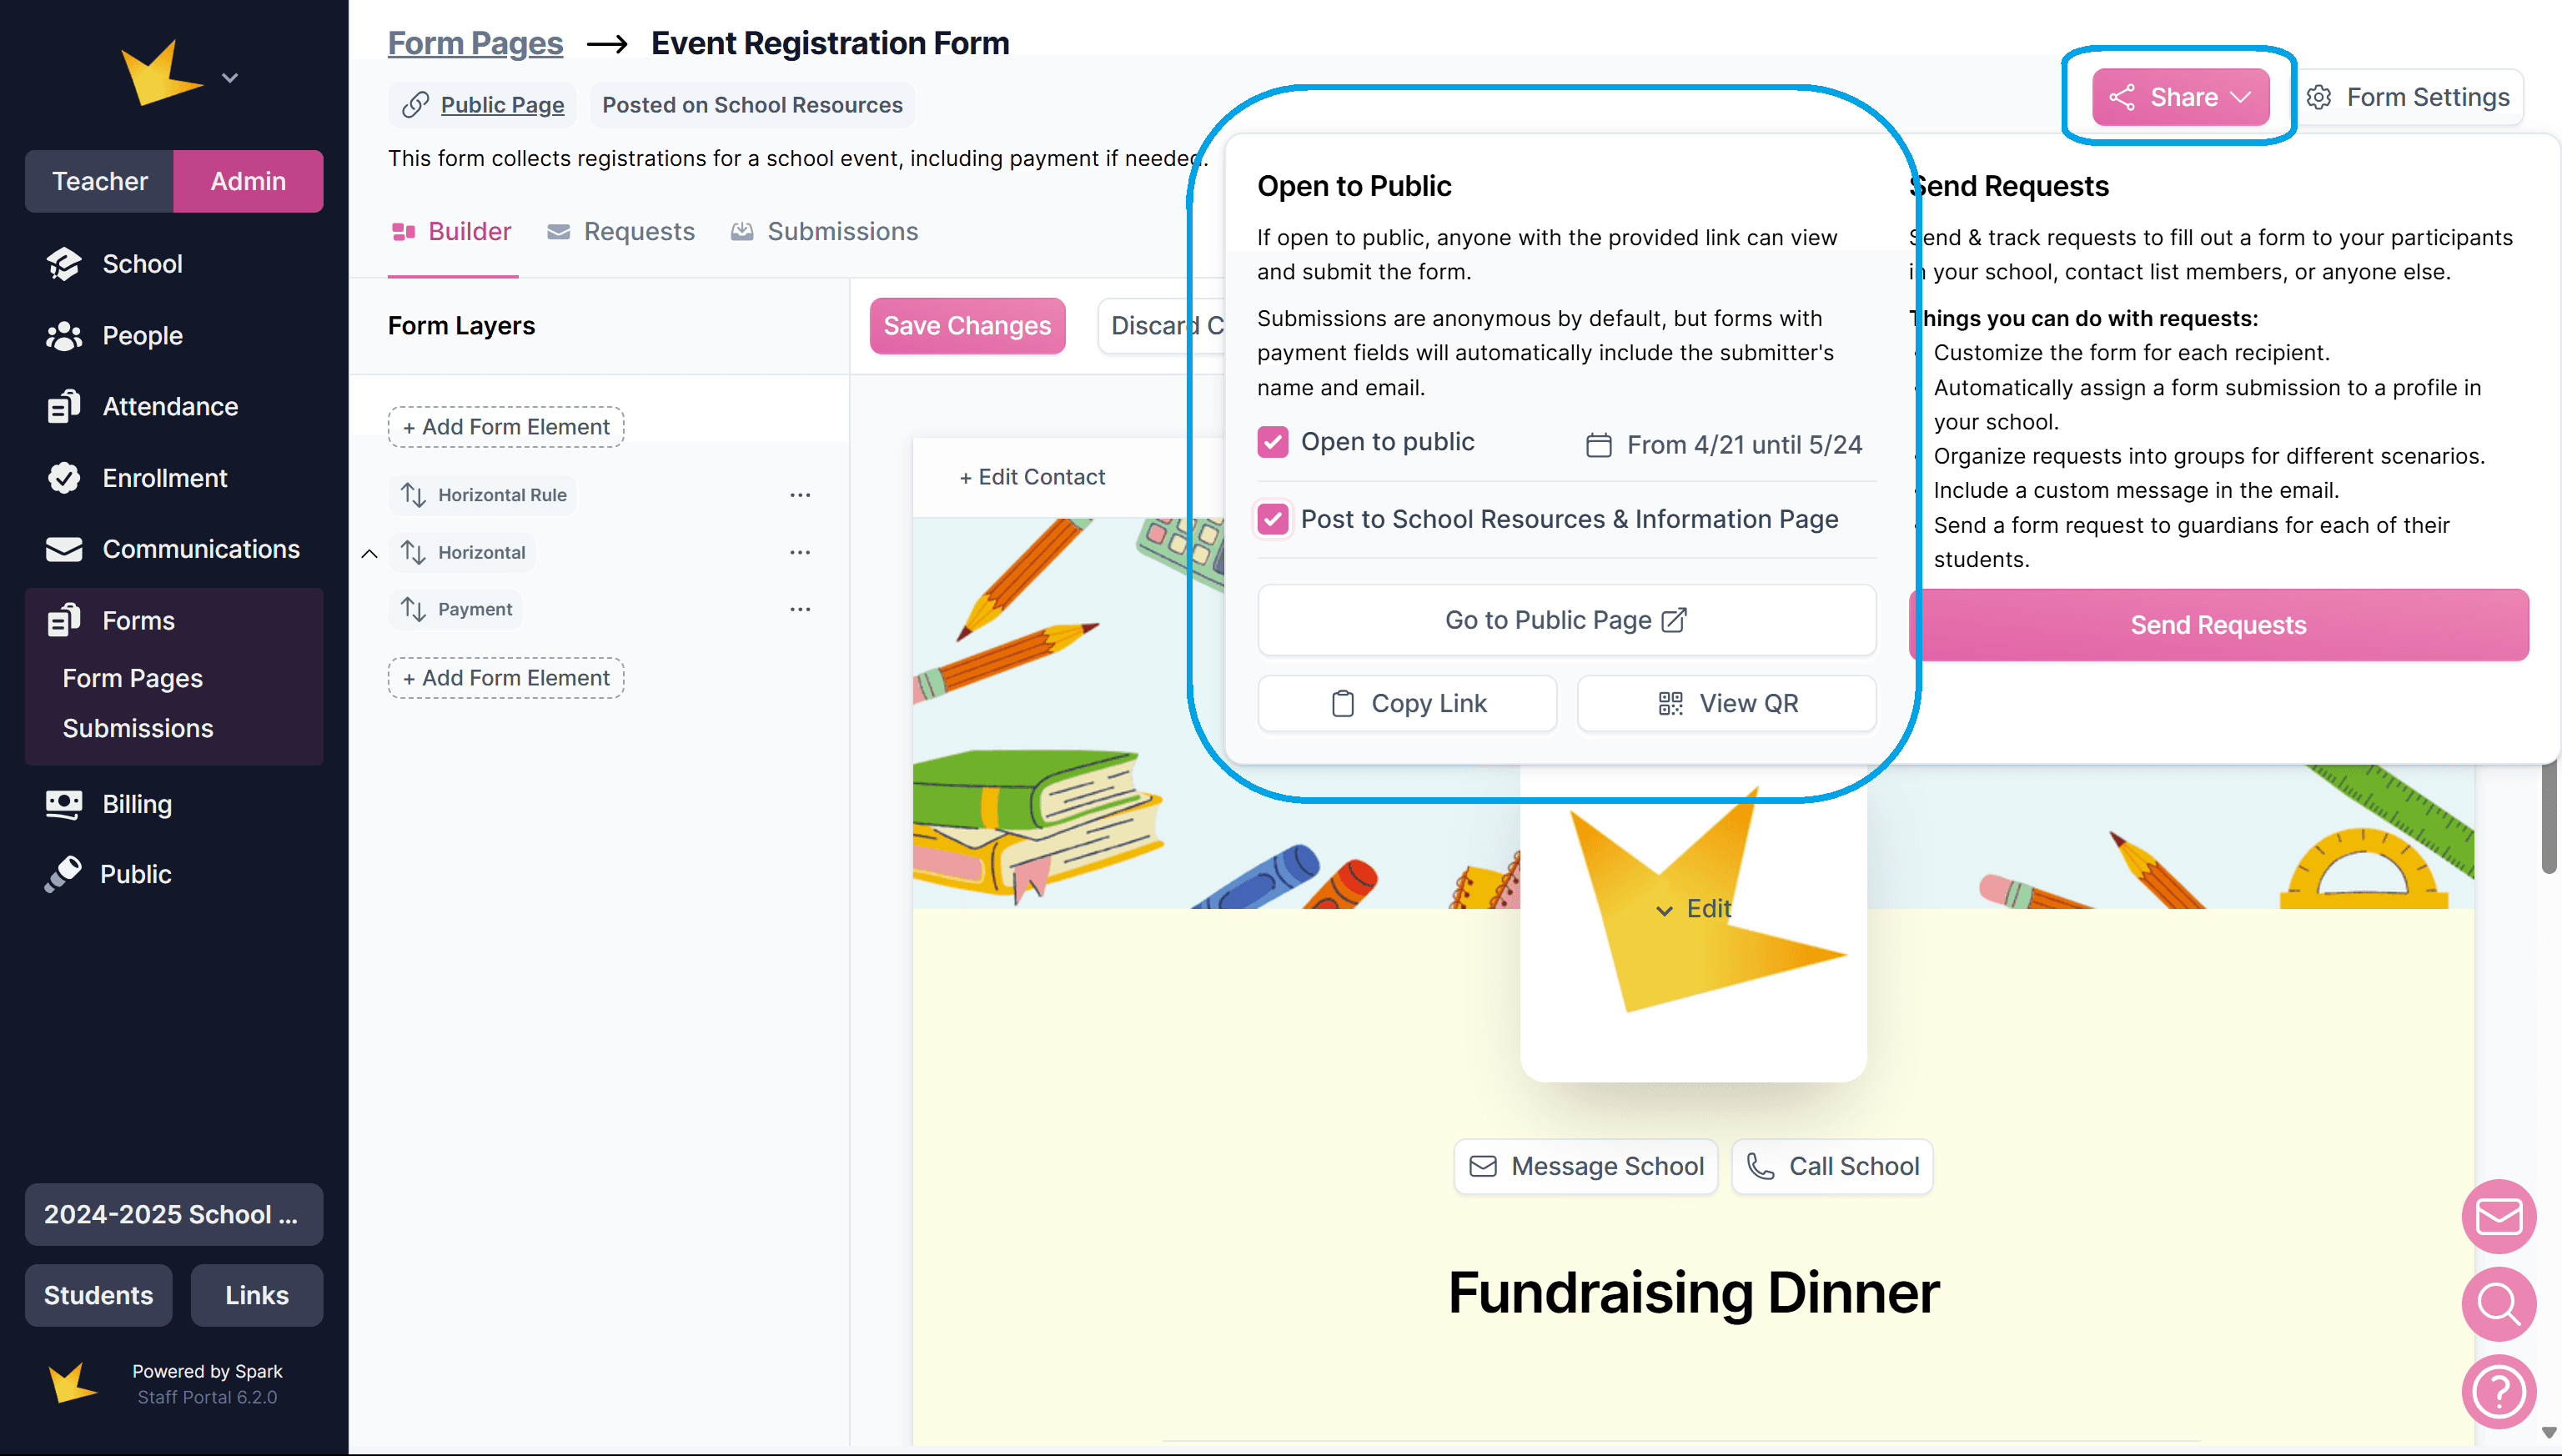
To share a form, open it and click Share in the top right corner. Then, choose how you want to share it.

Sharing Forms Publicly
To share a form publicly, open the form and click Share in the top right corner. You can:
- Generate a link or QR code: Share this with anyone for access and submissions.
- Set public dates: Specify when the form will be available.
- Post on School Resources & Information Page: Forms can be added here and are accessible until removed.
- Post to Guardian Portals: When posted to the School Resources & Information Page, forms are also posted to Guardian Portals. Guardians can submit forms multiple times if needed.
For forms that require a submission from specific recipients, or that should only be submitted once, send Form Requests rather than opening the form to the public.
Requesting Form Submissions
For forms that need to be filled out by specific individuals, send form requests:
- Click Send Requests to access the Requests tab.
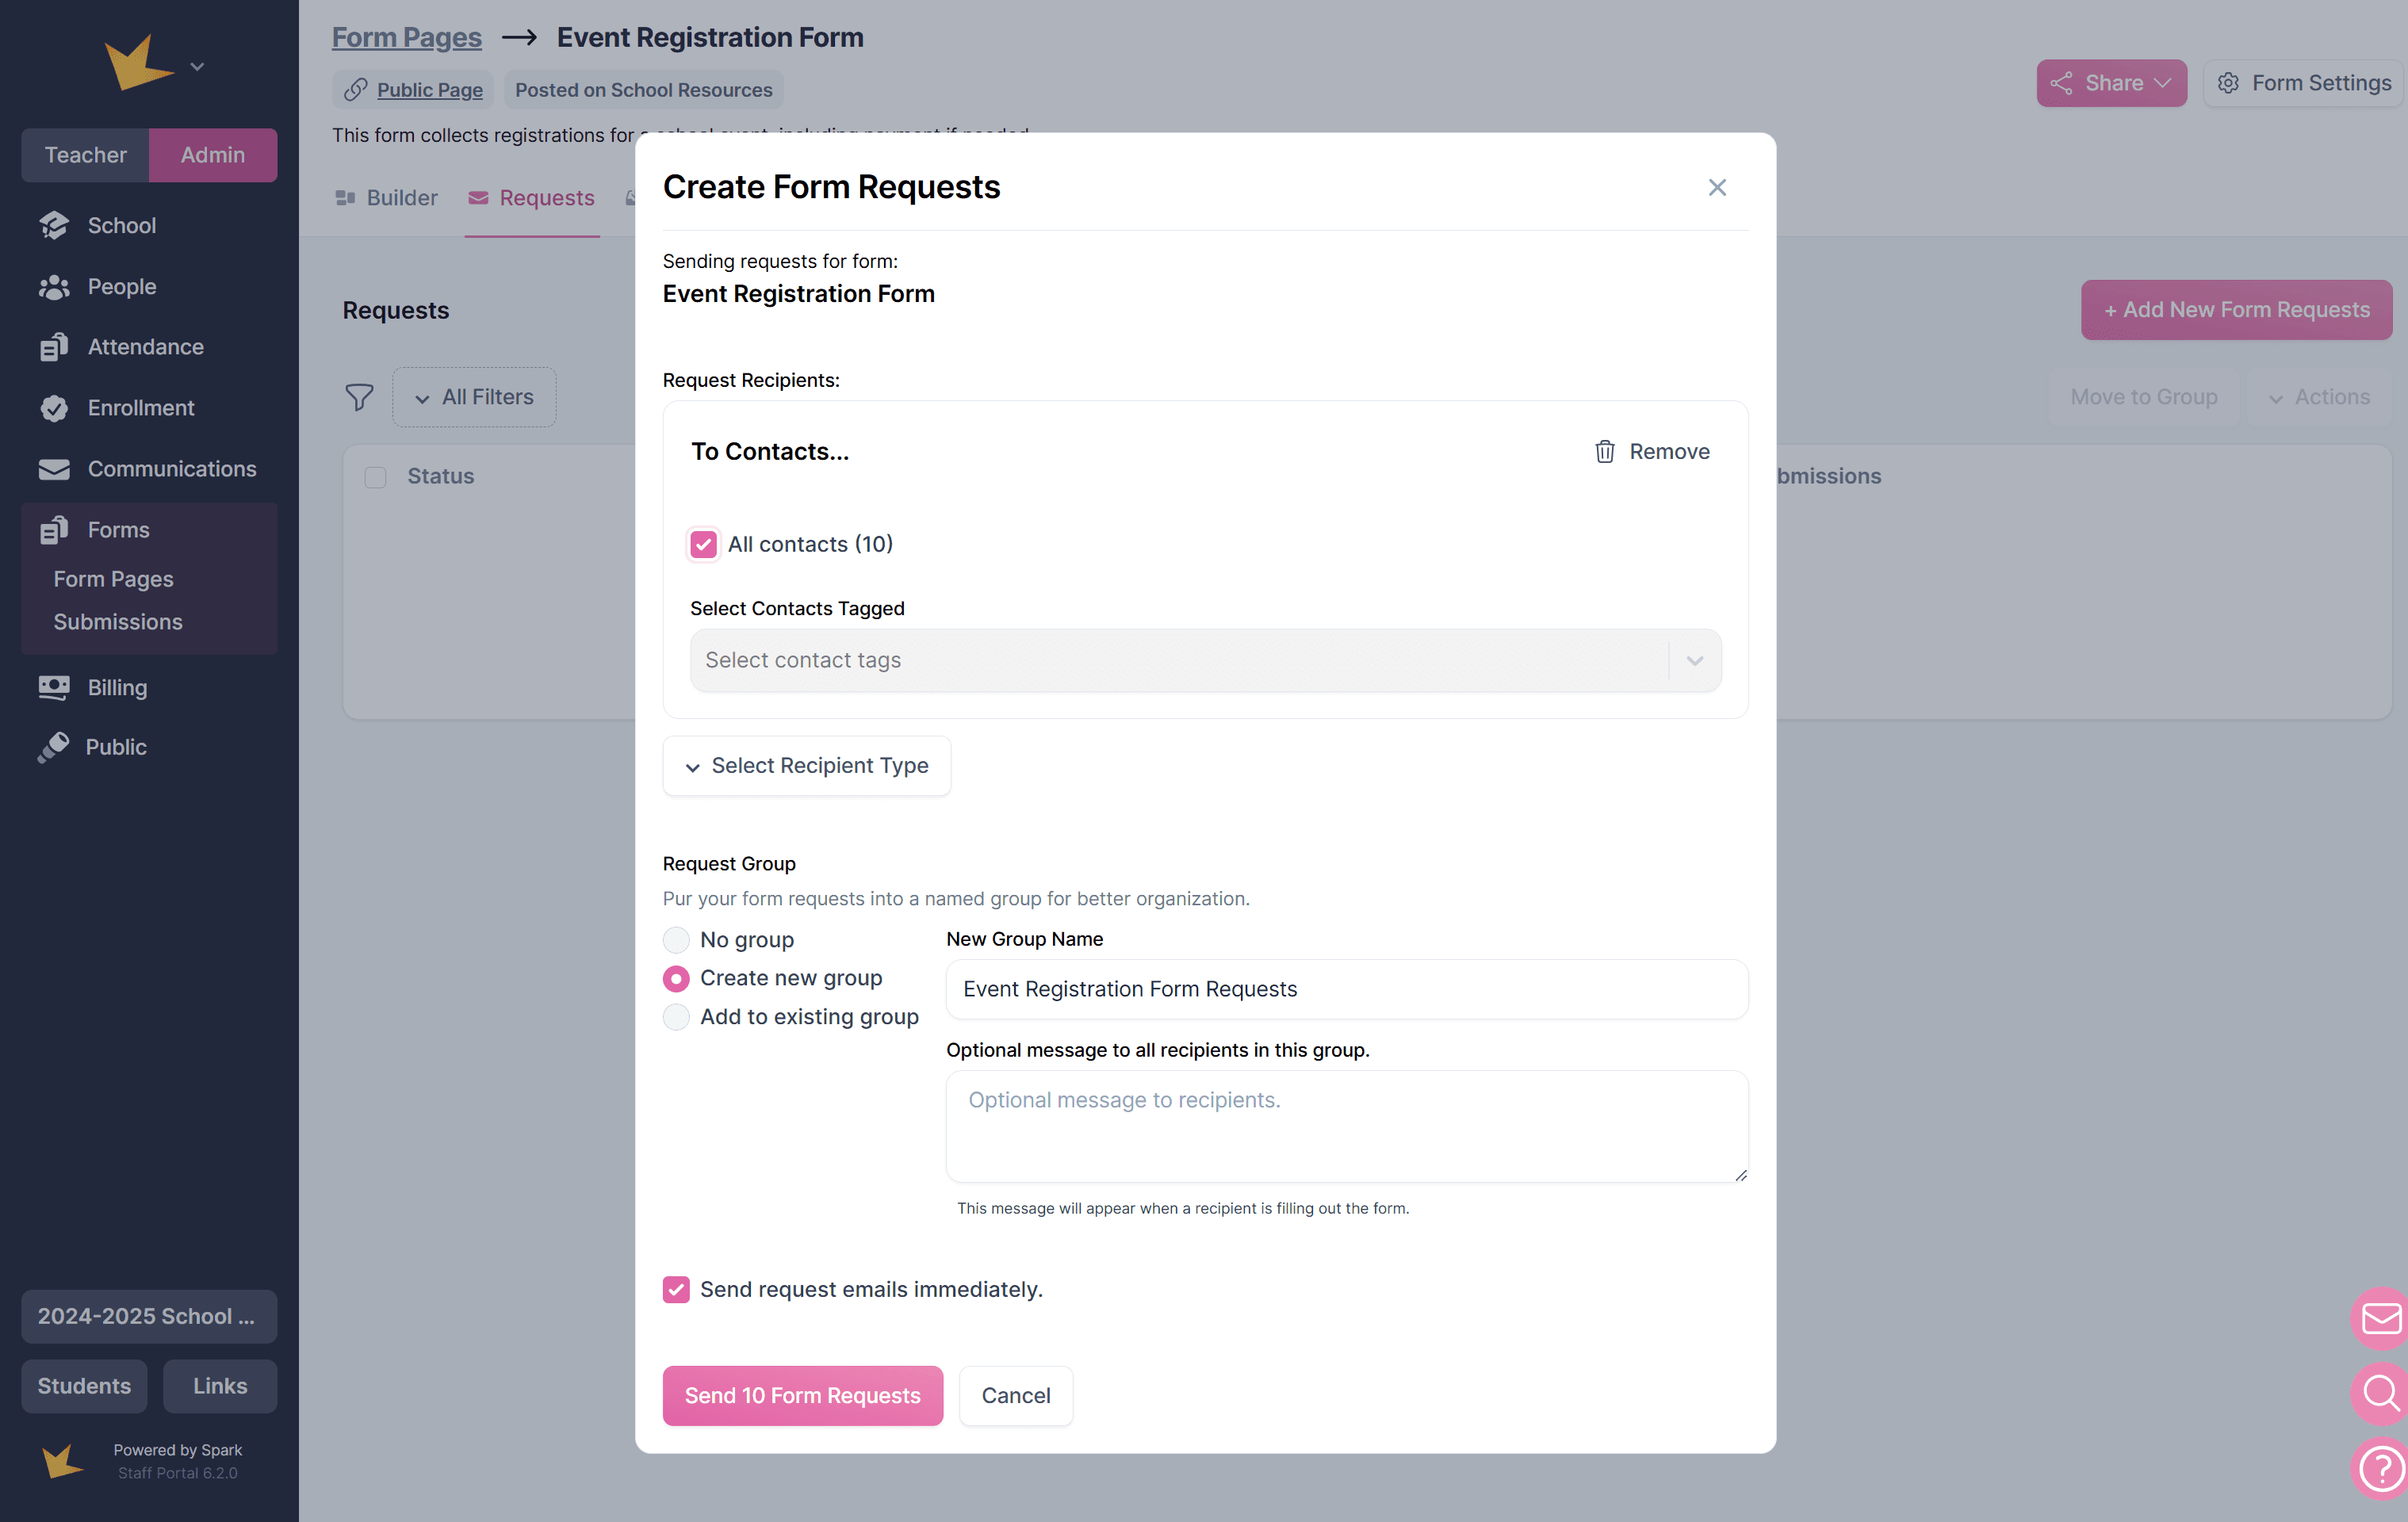
- Click + Add New Form Requests.
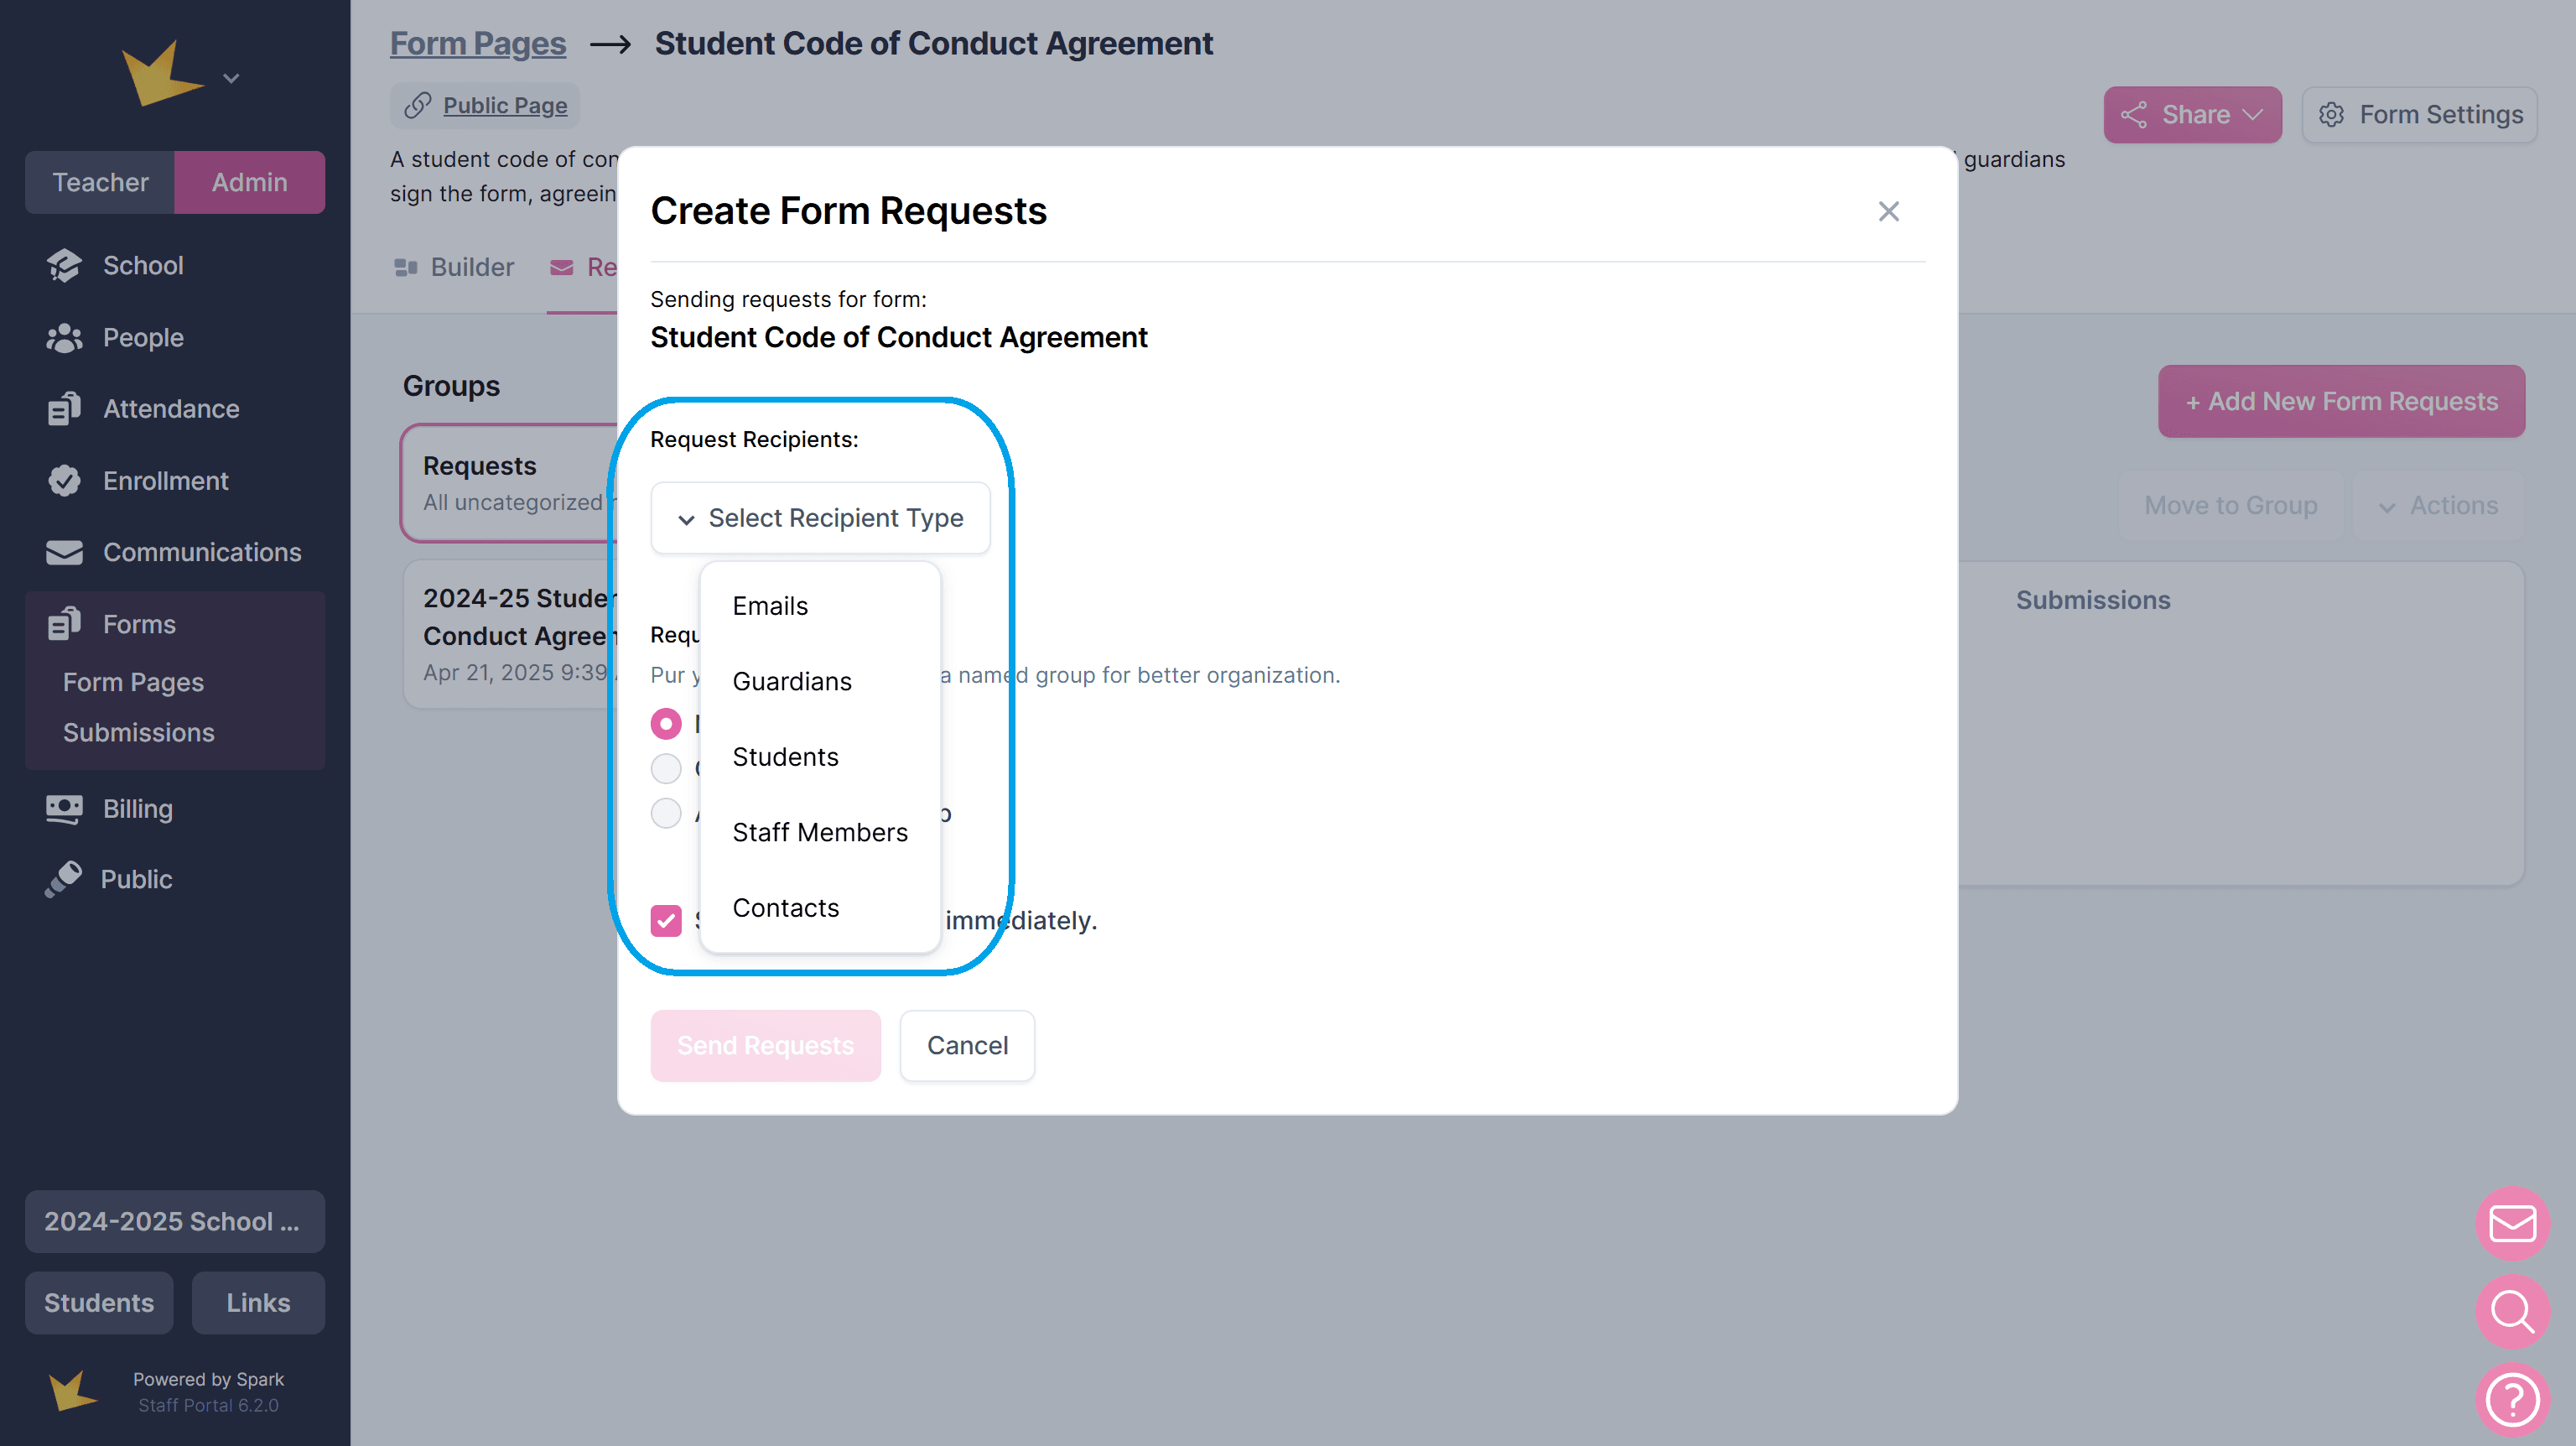
- Choose the recipient type.
- (Optional) Create a Request Group to track the batch of requests.
- Decide when to send the requests:
- Send immediately
- Save for later (This allows time to add a message or customize the form for specific recipients before sending.)
This structured approach ensures that forms are shared efficiently and reach the right people.

Key Features of Form Requests
- Organize requests into Groups: Batch requests into Groups to manage requests by type or time frame and easily track requests and submissions.
- Link submissions to profiles: Automatically connect form responses to people profiles in your platform.
- Customize Requests: Tailor the form for specific recipients or groups, including custom messages and edits.
- Schedule Requests: Set up future delivery dates for form requests.
Recipients of Form Requests
Select from several recipient types when creating a form request.
- Emails – Add recipients manually by entering email addresses.
- Guardians – Select guardians from your school. Forms can be requested for each guardian's student if needed. Primary guardians only can also be selected.
- Students – Select students from your school.
- Staff – Select staff members from your school.
- Contacts – Select contacts from your Communications contact list. To learn more about how to create a contact list, go here.
For individuals not in the Spark platform, you can send forms via email by selecting the Emails option under recipient type.
All recipients will recieve an email requesting the form submission.